We’ve been experimenting with potatoes for years.
 Spuds in my duds!
I tried growing potatoes in my pants, in t-shirts, pillowcases, garbage bags and my husband’s shorts! But when the “spuds split our duds” I knew it was time to get a little more serious!
That’s when I gave it another shot using a burlap coffee sack. It was so fun, I ordered an entire pallet of recycled coffee sacks and brought them to school to experiment.
Then opened up a farmers market booth to sell gourmet potato grow kits. I was on a roll!
I was seriously having fun! Potatoes grow well in recycled coffee sacks, grow bags, pots and raised beds.
I learned a few things about growing potatoes from trial and error, and one of the keys is to mound up the soil to protect the potatoes from the sun.
The best containers for potatoes are tall, hence the stacking tire method that many folks use. But tires, just no. I think we’re past that.
Coffee sacks are fun and biodegradable!
A jute bag can be plunked down anywhere – on a balcony, patio or garden bed. It looks natural and doesn’t stick out like a sore thumb. The material is woven so drainage holes come standard. Air flow and rot prevention are built in. It’s great to reuse something that already looks earthy.
Burlap sacks can be used in the garden to grow many types of vegetables and fruit!
If your sack once held coffee beans and has any kind of logo or print on it, it might even look cool next to your patio seating or flanking a bench.
Check out our fun video, still getting views after many years.
How long does a coffee sack last?
A coffee sack will stay together for at least a couple of seasons. The natural fibers eventually break down and many gardeners lay them flat on the ground after use for weed control or as a mulch.
3 Easy Steps for Growing Potatoes in a Bag or Sack Above Ground
1) Gather the supplies needed for growing potatoes in containers, e,g., recycled coffee sack, burlap bag, tall grow bag, hamper or large container.
- Seed potatoes
- Rich garden soil. We like to amend our soil with worm castings and compost.
How do I choose potatoes to grow in the containers? Should I plant potatoes from the grocery store?
You can use potatoes from the store. They should be organic to ensure they have not been sprayed with a growth hormone to prevent sprouting.
Buy certified seed potatoes from a professional grower. Certified seed potatoes are disease and pest free. They may give you a more reliable and larger harvest. There are also sweet potato seeds available. Growing sweet potatoes is a different process from traditional potatoes. Check out the video and tips on growing sweet potatoes here. We grew over 25 pounds of sweet potatoes in one grow bag!
2) Plant the potatoes in your pot, bag or container.
When to plant potatoes?
You can plant your seeds in the fall if you don’t get hard frost in the winter. Many folks in Southern California start potatoes in November! If you live in USDA Zones 1-7, recommend waiting until early spring to plant. As with any seed, results will vary depending on growing conditions and level of care.
How do I store seed potatoes until planting?
If you cannot plant right away, store your seed in a cool, dark spot where the potatoes won’t dry out or freeze. Ideally, you would plant 1-2 weeks after you receive the seed. Keep each potato individually and loosely wrapped. Ideal temperature range is 35 to 45 degrees F. A garage, basement or unheated closet works well.
Should I pre-sprout my potatoes, also known as “chitting”?
If you want to encourage your potatoes to sprout before planting, you can “chit” them. You sit them with eyes up in a cool place with some light and wait. Don’t let them touch each other. An egg carton is a perfect chitting tool.
I don’t chit and I’m not a closet chitter. I’m just lazy and plant the potatoes without going through any pre-sprouting rituals. If you are into chitting, let them eye-out 2- weeks before planting and plant sprouts up toward the sky.
If using a burlap sack, fold it a bit to start.
 Roll the edges of your sack down over the outside of the bag to make a very short bag about 4-6 inches high. Tuck in the bottom corners of the bag (optional) to improve stability of the sack and to conserve soil.
Add soil to your container, grow bag or burlap sack.
Fill your sack with approximately 4-5” of loose soil. Potatoes can grow in a variety of soils — rich, sandy — even straw. Heavy clay soil may not be the best choice. If you want to fertilize the soil, do it now.
How many seed potatoes do I plant per bag?
 If a seed potato is large (more than 2.5” long) and has more than one eye, you can cut the potato into 1-2 inch sections (keeping an eye on each section). You’ll plant only 3-4 pieces in the sack.
If your potato is small (1-2 inches), don’t bother cutting it into sections. Plant any extra seed in another container!
Some folks insist on waiting a day after cutting so that the cut area gets a chance to callous over. This is supposed to prevent rot. I don’t wait – I just plant it but if you are concerned about rot you can delay planting for a day. Do not let the seed potato dry up.
How do I position the seed potatoes in the bag and how far apart?
Place the potatoes on top of the soil, eyes/sprouts pointing up toward the sky.
Plant the seed at least 6 inches apart.
3) Mound up over your potato plants during the growing season.
In the beginning, top your potato seed with 4”-6” of loose soil.
Once the leafy plants push through the soil (2-4 weeks) and the green tops grow more than about 8” tall, mound up the soil around the plant to promote growth of more potatoes under the mound.
Leave some of the leafy vine above the soil (4-6″).
Mounding Up is one of the secrets to getting a larger harvest! 

How do I water and fertilize the potato plants that are grown in containers or bags?
Keep moist at all times but don’t over-water (to prevent rot). Don’t let your sack dry out.
Shelter the bag if you have excessive amounts of continuous rain.
Soil amendments added when “mounding up” may increase your harvest and improve plant health. We use a combination of compost, worm castings and kelp brewed into a compost tea.
When do I harvest potatoes grown in bags or containers?
After approximately 80-100 days, the plant will stop flowering and you’ll see signs that it’s starting to die (turns yellow or brown and withers). Wait 2 more weeks after the plant shows these signs and then try to harvest!
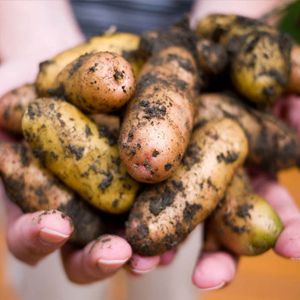
Waiting allows the skin of the potato to set. Dump the sack over or carefully dig the potatoes up as you need them.
YUM! If you harvest them all at the same time, store as you would other potatoes, in a cool, dark spot where they won’t dry out.