Pickled watermelon rind adds a new twist to many a dish! This article gives you key tips for making the best watermelon pickles eva!
 !UPDATE I ate 3 of these jars alone last week – glad I gave away the others. ADDICTIVE!
Most folks have never tried watermelon pickles – that’s why I love making them. Their kinda special. When you share a jar you’re sure to get smiles in return! It’s often a sentimental food for those that have tried them before. I hear lots of comments about sweet grandmothers when I mention these pickles. Now that pickled watermelon rind is becoming more trendy, learn how to make the pickles several ways to liven up your food and impress friends and family. A simple jar of watermelon pickles wrapped with a beautiful ribbon makes a wonderful hostess gift. Reserve some for holiday gifts this year! You’ve got time. It’s easy.
For those of you that don’t reuse the rind for your animals or compost, why not make something with it instead of sending it to the landfill? My youngest daughter loves watermelon and although I dread carting them back home from the market, I’ve managed to make good use out of every ounce of flesh, rind and skin. Most often, I feed the watermelon rind to my composting worms. It’s one of their favorite foods. Every once in a while I save out the rind to make pickles. They remind me of summer any time of year. If you process them in a hot water bath, they’ll keep for months. If you don’t have the time or the inclination to go through the canning steps, you can keep them in the refrigerator up to a month!
HOW TO USE PICKLED WATERMELON RIND:
- Right outta the jar for a pick-me-up treat
- Condiment alongside chicken and pork dishes
- Relish on hamburgers and hot dogs
- Chopped and incorporated into Asian-style coleslaw or pasta salad
- Given as gifts to friends, family and coworkers – inexpensive and special. Add a tag that lists out your ideas for use.
WATERMELON PICKLES RECIPE
INGREDIENTS AND SUPPLIES NEEDED FOR SWEET WATERMELON RIND PICKLES:
- One large watermelon – makes 6-8 pints of pickles
- 2 cups white vinegar
- 1/2 cup Kosher salt
- 2 1/2 cups sugar
- Whole cloves
- Allspice berries
- Cinnamon sticks
- 2 Meyer lemons sliced OR one Eureka lemon sliced
- 2 large pots
- 1 large glass bowl
- Large slotted spoon
- Large mixing spoon
- Large colander
- Measuring cups and spoons
- Large knife to cut watermelon into slices
- Paring knife to remove skin
INSTRUCTIONS FOR SWEET WATERMELON PICKLES:

DAY 1
STEP 1: PEEL AND CUBE THE WATERMELON. Cut the watermelon into large chunks and then 1-1/2 inch strips. It doesn’t need to be perfect. Using your paring knife, remove the outer green skin just enough to see the rind but retain some green color as much as possible. Some of my pieces end up with no green. Remove most of the pink flesh but not all of it. You want some color to your pickles. Find the method that works best for you. Cut the skin from large pieces or smaller cubes. Finally cut your peeled watermelon rind into its final size. I like to cut them into 3/4 inch rectangles give or take. They are not perfect. It’s is wise to keep all your pieces similar in size for uniform cooking. You wouldn’t want a mushy pickle sitting next to an ultra-crispy pickle. Place the finished cut rind into a large bowl.
STEP 2: BRINE THE RIND. Make the brine in a non-reactive bowl. This is a bowl that will not create a chemical reaction with salt or acid. Do not use aluminum or copper. The best bowls are stainless steel, glass or plastic (does not absorb odors or colors from food). I prefer glass. Mix 1/2 cup kosher salt with 1 quart water in the bowl. Stir until salt is dissolved. Add your watermelon rind. Cover and place in the refrigerator overnight or for several hours.
DAY 2
STEP 3: DRAIN, RINSE AND BOIL THE RIND. Fill a large pot halfway with water. Bring to a boil. While the water is coming to a boil, dump the rind in a colander and rinse under cool water for 5 minutes. Carefully place in the boiling water. I use a large spoon to gently drop the rind in the boiling water. Boil for 5 minutes – test to see if tender but not soft. Drain and rinse again.

STEP 4: MAKE THE SYRUP AND ADD THE WATERMELON RIND. To a large pot add the vinegar, sugar and lemon plus 8 whole cloves and 8 allspice berries. Heat on medium and stir until sugar is dissolved. Cook for 30 minutes, stirring often. Using a slotted spoon, remove the lemon slices. Eat those as a snake or use in a marinade. Add the watermelon rind to the syrup and cook for 10-20 minutes. Test the pieces to achieve desired firmness. I don’t like mushy pickles so I cook just until a fork slides in with some resistance. I bite into it and when I’m satisfied with the texture I turn off the heat and move the pot to a cool spot. Meanwhile, if preserving using canning jars…
IF CANNING: Before you start making the syrup in Step 4, prepare your canning jars. Use new jars. Take the lids and rings off. Your jars need to be hot when filled to ensure they don’t experience temperature shock and crack. You also want to sterilize your jars. You might as well do this all at the same time. Place a cloth (or canning rack) on the bottom of a very large pot. You don’t want the jars to be in direct contact with the pot bottom. Fill the pot with water enough to cover the jars by 2 inches. Place the jars in the water so they are completely submerged and full of water. Reserve the rings and lids on the side for now. Fill the jars 1/2 full of water and place in the pot. Bring to a boil and continue boiling the jars for 10-15 minutes. If you do not have a canning setup, place your tong ends (and any other instruments that will come in contact with the jars) in the water too but not the handle. I use a combination of silicon tongs and a big basket-like spoon to lift my jars out. Be safety conscious. Do not allow children near boiling water or the process of taking the jars out of the water without careful supervision, proper tools and clothes to prevent burns. Turn the heat off after 10-15 minutes and let sit for 5 minutes to cool slightly as a safety measure for handling. Carefully remove one jar and place the lids and rings in that spot. Remove the rest of the jars. Keep the lids and rings in the hot water until you’re ready to use.
STEP 5: FILL THE JARS WITH SPICES, THEN WATERMELON, THEN SYRUP. To each jar, add 5 whole cloves, 5 allspice berries and one small stick or piece of cinnamon. Using a slotted spoon IMPORTANT, add the watermelon to the jars. use a smaller spoon to help guide the pieces into the jar to reduce mess. Fill to 1/2 from top of jar. Jiggle the jars and manipulate the pieces so you don’t have large gaps. They should be loosely positioned, not squished into the jars. Then with a spoon, add the syrup to 1/2 inch below the top of the jar. Wipe the rim of the jar with a clean cloth. Fetch the lids from the hot water bath.
Place on top of the jars, followed by the rings. Finger-tighten. That means tighten only using your fingertips too prevent over-tightening. Jars will be hot so take caution. If you do not process the jars, the pickles will keep for a few weeks in the refrigerator. Refrigerate once the jars have cooled.
IF CANNING: Place back into the hot water bath and boil for 10 minutes for pint jars, making sure water is at least 2 inches above jars. Remove carefully and let sit for 24 hours undisturbed. Do not press on the top of the jars, tilt or shake. Jars should create a vacuum on their own and the tops should pop inward. If you have a bulge on the top of the jars, use these as refrigerator pickles only. They will last at least 2 weeks and maybe a month refrigerated. Store preserved pickles with rings off in a cool dark spot until you are ready to use or gift. Place the rings back on before gifting.
 THINGS I LEARNED FROM SEVERAL ROUNDS OF PICKLING WATERMELON RIND:
Use these tips to improve your pickling experience:
- DO NOT use iodized salt – it will impart a chemical-like flavor and will darken your pickles in an unappetizing way.
- RELAX. Sit down while peeling the skin off the rind. Give your feet a break.
- SWEET VARIATIONS. Add 2 heaping tablespoons of honey or a cup of white grape juice to the syrup before cooking to add complexity.
- KEEP YOUR JARS LOOKING SHINY. Add 1/4 cup white vinegar to the final hot water bath (jars closed) to reduce annoying mineral deposits on the outside of the glass jars.
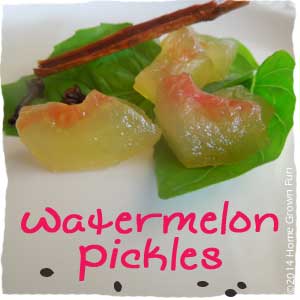
- EXPERIMENT WITH HERBS! Add herbs to the jars just before filling. I like to add whole basil leaves!
- GET CREATIVE! Spice up your pickles with a dash of red pepper and onion. Replace the cloves and allspice with crushed red pepper and diced or dry minced onion.
- BE FIRM. Retaining some of the green color of the skin gives your pickle a nice bite to it. Remove too much and your pickle will be softer. After you cook the rind the green will disappear, unfortunately.
- MORE FLAVA! I love replacing a cup of the white vinegar with seasoned rice vinegar.
- BOTTOM’S UP. Add the whole cloves and allspice berries to the bottom of the empty jar so that their flavor will be absorbed well. They will gradually float up. If you add the spices to the top it won’t look as visually appealing and the spices won’t meld with the syrup as effectively.